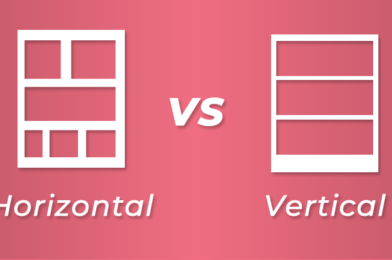
When figuring out the layout for a webcomic, creators are often faced with the question: ‘Should I design it with the old school horizontal layout or the modern vertical(webtoon) layout?’ Short answer is both. Both layouts have their pros and cons depending on which devices the comic is being viewed from. If you want to reach the widest possible audience possible, it’s paramount that you make the right decision for your format. Let’s take a look at the pros and cons of each.
Traditional/Horizontal Format
PROS
Ideal for large screens like on desktops and laptops.
Takes less time prepping the comic images for your website.
If you are planning on printing your comic at some point, this is the format to use.
Allows for a variety of panel layouts.
Perfectly suited for action/superhero comics with dynamic panels.
Ability to lead the readers eye in any direction.
CONS
Makes for a poor reading experience on mobile devices.
Restrictions on the detail you can put into each panel of the comic.
Reader can glance ahead at a panel with a punchline or story twist, lessening the surprise factor.
Not a good format for webcomic aggregators like LINE Webtoon and Tapas and social media platforms like Instagram.
Webtoon/Vertical Format
PROS
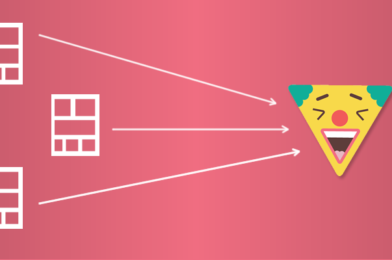
Provides a great reading experience on mobile devices (smartphones and tablets).
A wider audience reach. Statistics show that online comics are read more on mobile devices as opposed to desktop devices.
Used by leading webcomic portals like LINE Webtoon and Tapas.
With proper slicing of the panels, can be posted on Instagram.
Greater ability to surprise since you can only view one panel at a time.
Creator can pack in a lot more detail into each panel (including lettering) making for a more immersive reading experience.
Works best for short form comics like gag-a-day comics or the daily comic strip format.
CONS
More work is required to slice comic into images for each panel.
The format does not work for a print layout as you can pack fewer panels into a page compared to the traditional layout.
Panels are too large for large screens.
Requires a lot of scrolling
Slows down the pace of reading which makes it ill suited for action comics or short form comics.
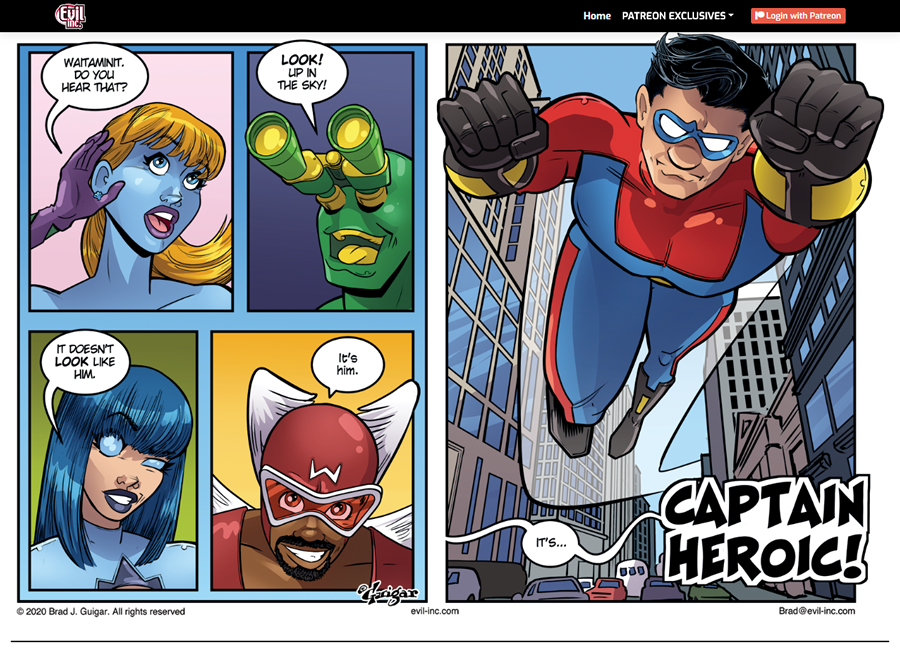
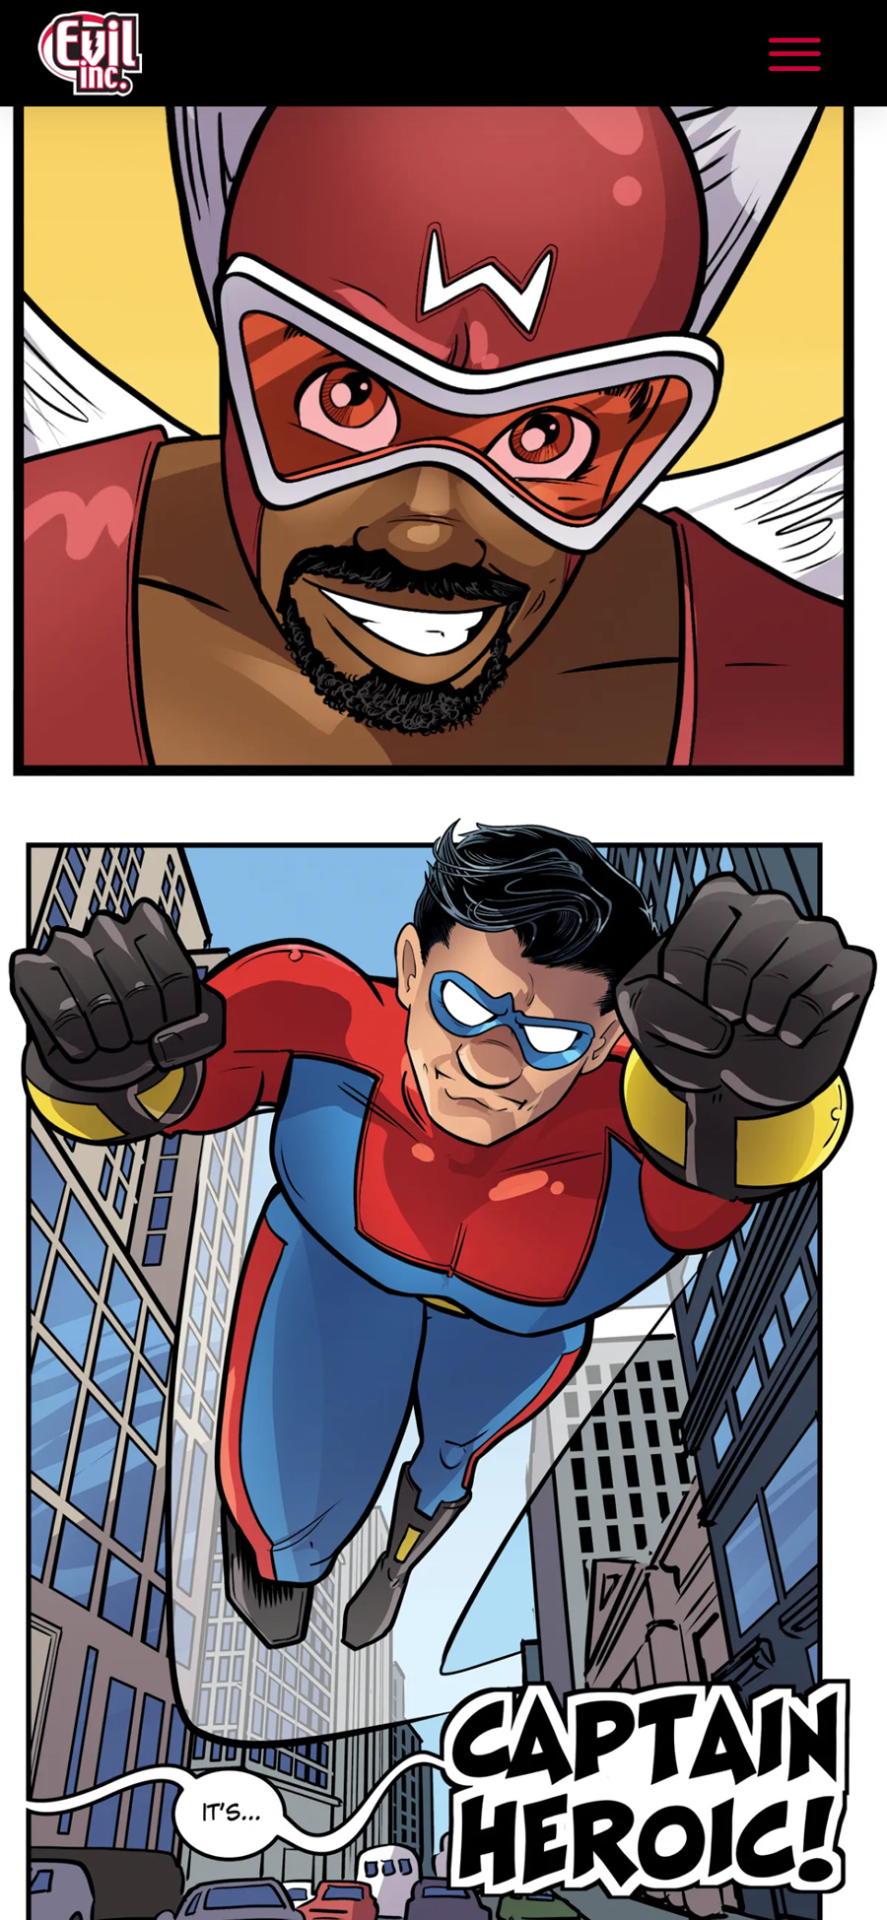
Having taken the pros and cons of each format, how do we make use of both formats to maximize your audience? By creating a responsive comic! What I mean by that is you can create a horizontal version of your comic for anyone browsing your comic on a desktop device and also a vertical format for mobile device readers. It does require quite a bit of extra work, but this gives you the best of both worlds therefore ensuring you have as many readers as you can possibly have. A great example of how this approach can be implemented is on website I built for Brad Guigar’s Evil Inc. webcomic. Notice how you get a traditional format for the on a desktop screen and the webtoon format on the mobile screen.
Desktop View
Mobile View
If you are convinced that you need to post both formats of your comic to your website, you may be asking how do I go about doing that? If you are using WordPress, then the good news is, I have created the perfect WordPress theme for you: Toocheke. It gives you the ability to publish two versions of a comic (desktop version and mobile version) for each post. All you have to do is prep the two sets of images, upload and publish. Give it a test run by downloading it for free here.
Do you need to publish a “responsive webcomic” on your WordPress website?
As a webcomic creator, you are most likely scrimping and scrounging for every reader you can get. By choosing one format over the other, you are automatically eliminating a portion of your potential readers. So why not use both?
So,you are a webcomic creator with a WordPress site already up using either a combination of both Comic Easel and ComicPress or just Comic Easel with your preferred theme. You have hundreds, maybe even thousands of comics in your archive and would like to make the switch to Toocheke. Is that possible? Will I be able to retain my comic archive, or will I have to re-upload every single one of the comics. The short answer is no. This short tutorial will take you through the few steps required to import all your current comics into the Toocheke theme.
Before going through the following steps I would make sure that you backup your WordPress website. There is a good tutorial here on how to do so with the free UpdraftPlus plugin.
Login to the administrator dashboard for your webcomic’s website.
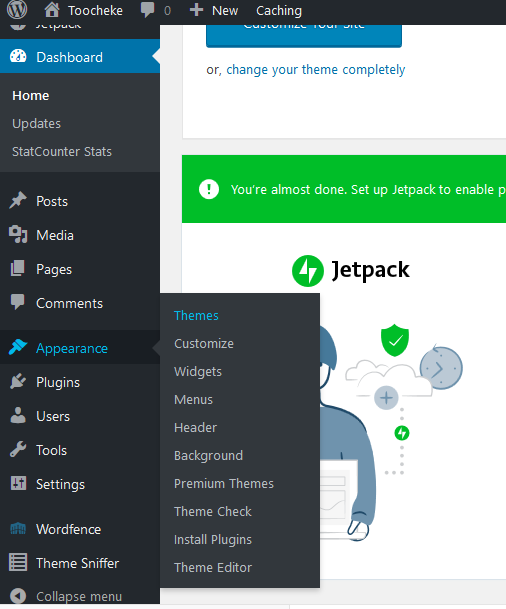
Go to Appearance > Themes and click the Add New button.
Just do a search for ‘toocheke’ and the first result should be the one you’re looking for.
Click the Install button
Download the Toocheke child theme from here. Note the location you save the zipped file.
Inside your WordPress admin area, head over to Appearance > Themes page and click on the Add New button.
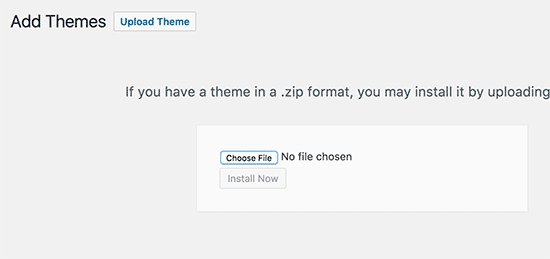
Click on the Upload Theme button. This will show you theme upload option.
Click on Choose File to select the toocheke-child.zip file from your computer and then click on Install Now button.
After the installation is complete, click the Activate button to activate the child theme.
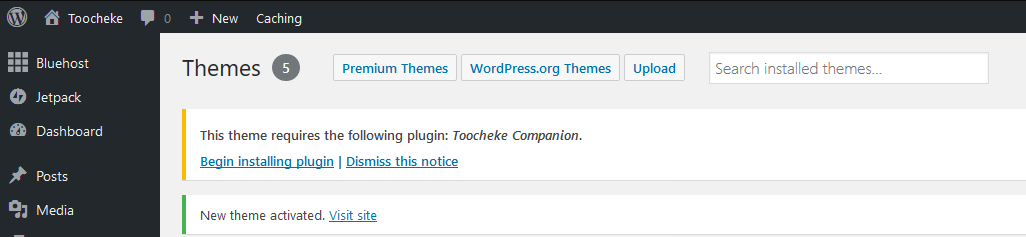
You should now see a a notification (This theme recommends the following plugin: Toocheke Companion) in your WordPress admin panel asking you to install it.
Click on Begin Installingplugin link
You should be redirected to the Install Required Plugins page. Click on the Install link below the Toocheke Companion plugin. The plugin will install and activate.
Proceed to de-activate the Comic Easel Plugin from the Plugins > Installed Plugins menu
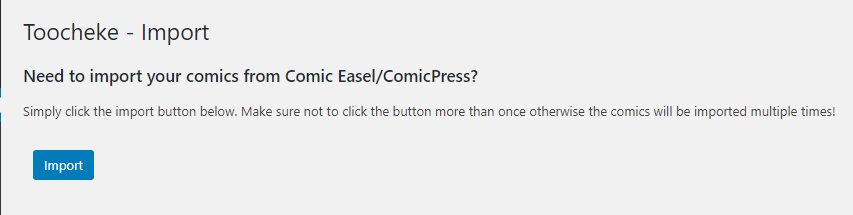
From the WordPress admin menu, go to Comics > Import . You should see the following screen.
Click the Import button. Make sure to click it only once otherwise the comic will import multiple times.
Once you get the success message, click on the Comics > All Comics menu and confirm that all your comics show up.
Next we are going to customize the theme layout. Click on Appearance > Customize.
Click on the Home Page Layout menu. Select the second icon (Traditional layout)
Click the Publish button.
Head on over to the front-end of your website and confirm that the latest comic shows up on the home page.
That is all there is to it! You can now customize The Toocheke theme as much as you would like using the Customizer(Appearance > Customize).
If you encounter an issues or need some help with the import process fill free to contact me on Twitter @toocheke or via email.
LINE Webtoon? Tapas? Instagram? Facebook? Tumblr? Reddit? Hiveworks? Self-Hosted? WordPress?
When considering where to publish a comic, creators are often faced with a daunting question; what is the best platform for hosting my webcomic? Where I can I get maximum exposure for new readers to my comic. This post will try and delve into the various options for comic creators.
When it comes to social media, three options quickly come to mind. Instagram, Reddit, and Imgur. Both Reddit and Imgur have sections that are exclusively dedicated to comics. Be aware though that the readers here can be very harsh critics especially to newbie creators. If you are just starting out, your best bet is to hold off on both Reddit and Imugr. For social media Instagram is the place to be for cartoonists of all stripes. It has a thriving comic community that is supportive of creators that range from those just starting out, to established cartoonists. Can’t stress this enough, Instagram should be your first stop when it comes to social media. At this point you may be asking, what about Twitter, Facebook or Tumblr? Based on feedback from several comic creators, you are unlikely to gain any traction from these three options. But before ruling out any social media platform, try, posting on all of them, say, for a month. Figure out which platform get’s the most readership interaction,and then stick with that platform.
The same rule of thumb applies to the two most popular webcomic/webtoon portals: LINE Webtoon and Tapas. They both have a pre-established rabid mass of readers that are specifically geared towards comics. Some of the comics have as many as a million dedicated readers worldwide! Try posting on both for at least a month, figure out which one get’s the most readers/subscribers and stick with one. That is if you are not up to the task of posting to both websites on a regular basis. For what is worth, LINE Webtoon has gained a reputation as being much friendlier to the webcomic creator in terms of revenue sharing, syndication offers and copyright protections.
Your final option for publishing your comic online is self-hosting your website. One word of caution. You would have to do a lot of leg work in terms of Search Engine Optimization and marketing to drive new reader traffic to the website. Being aware of that, you would need to do the following:
Purchase a domain name for your website
Purchase web hosting for your website
Hire a web designer/developer for your website or use prebuilt website templates that are built for comics.
Need a website designed for your webcomic at an affordable price?
If you are on a budget and cannot afford a web designer/developer, your best option would be to purchase a web hosting plan that supports WordPress. Then you can download some free WordPress plugins and themes that are specifically built for webcomics. The two best options available are: ComicPress/Comic Easel and Toocheke. Both give you the ability to publish setup your webcomic site fairly quickly, and can be easily customized by someone with little to no experience with web design. They both offer features like a comic archive, and comic navigation links.
While comic readers rarely go to self-hosted comic websites(that is unless the comic is widely popular) it never hurts to have comic hosted on your own website. You never know when the other platforms(social media/webcomic portals) you post on may go down. A self-hosted website provides a central hub where readers can get to follow their favorite comic.
So to sum it up, your best bet is trying to post on as many platforms as possible, with a pre-established webcomic readerership, find the one that works for you, and stick with it. Having a self-hosted website is not necessary, but if you want one and are working on a budget, consider using WordPress.
Do you need a free mobile friendly WordPress theme for your webcomic?
You have launched your brand new webcomic, you either self-host it, or maybe you have it hosted on one of the popular webtoon publishing portals (LINE Webtoon or Tapas), now how do you get new readers to become adoring fans of your comic? This article will delve into a few strategies you can use to build and promote traffic to your webtoon/webcomic. Some of the techniques can also be applied to blogs and websites, so do feel free to share this with anyone looking to increase traffic to their websites.
Network
Make contact with fellow webcomic creators either on social media (Twitter, Instagram, Facebook etc.) or in online forums. Introduce yourself to them, offer to collaborate with them, maybe with some guest posts, or offer to promote their comics. When it comes to forums, make a point of creating a signature that includes a link back to your comic and maybe your social media profiles. Also get to know the rules of the forum. Don’t SPAM the forum with posts that are all about promoting your comic. Instead make friends, help out other creators if you can, or just compliment other creators for their work. The career of a comic artist can be a lonely one, so forums are a perfect setting for socializing with a tribe of individuals with whom you share similar interests. The following are some popular forums for webcomic creators:
Networking with other comic creators is not only an opportunity to learn from others who are already established in the industry, but gives you the ability to recruit an army of like-minded pals who can get more eyeballs on your comic. C’mon, don’t be shy.
Trending
When it comes to social media platforms like Twitter, Instagram or Facebook, make a daily practice to check on what is trending (especially among the webcomic community) and then post something relevant to the trend. Examples include #inktober, #webcomicchat, #toonme
Diversify
Make a point of posting your comic to as many platforms (webcomic portals, social media) as you can. The more places you post to, the more you increase the odds that readers will accidentally come across your comic, recommend it to their friends, and before you know it, you are gaining a ton a of traffic to your webcomic. Make sure that you include the URL link to your webcomic within the comic image. The following are platforms with a proven track record for boosting readership for comic creators. Do a trial of all them, find the one that gets the most audience traction and stick with that platform.
You will find that the top 3 platforms for webcomics are LINE Webtoon, Instagram and Reddit. Be wary though of Reddit and Imgur, they are both known to have communities that are a tad bit caustic, more so to comic creators who are just starting out. If you are looking for the most comic friendly environment for a creator that is just starting out, go for Instagram. Make sure when posting on the social media platforms, that you include hashtags that are popular for webcomics e.g. #webcomic #comic #webtoon #instatoon #lol #funny etc.
Search Engine Optimization
So, here is where we get a bit technical. Another way for users to discover your webcomic is by using the ubiquitous Google. But for your comic to rank high in Google’s search engine results, you are going to have to do some leg work, what is referred to as Search Engine Optimization (SEO).
To understand the best way to go about SEO, first you will need to know how Google ranks websites. Google’s algorithm is based on a couple of factors: the quality of your content (does it have lots of appropriately placed keywords that match up with what is being searched), and the quantity of high authority quality back links to your website. If there are several reputable websites linking back to your webcomic website, the higher your site will rank.
Armed with that knowledge, what can you do to get your webcomic ranked high on Google? Here are some steps you can take.
If you have a self-hosted website, have a blog section on your home page. Google loves text! Topics to consider could be tutorials, film reviews, comic reviews or publicizing events that you may be attending to promote your comic. Post anything remotely related to your comic. Also make a point of including keywords and phrases that are likely to be searched by a comic reader (e.g. Webcomic, comic, cat comics, slice of life). Play around with this. Be careful though not to overdo this with keyword stuffing (i.e. putting in lots of keywords that have nothing to do with the blog post or do not go with the natural flow of the article). Google can easily detect this and will penalize you for that.
If your webcomic is self-hosted, try and get some quality back-links to your website. The easiest way to do this is create as many social media profiles as you can and include your website’s URL in your profile bio. If your comic is hosted on established websites such as LINE Webtoon, Tapas or Instagram, they are doing the heavy lifting of SEO for you. So, nothing will be required on your part. Also do some link-exchanges with other webcomic creators. Create a page on your website (or a section on your homepage) where you can feature links back to other creators. Another cool way for to get back-links is, directories, which I will talk about in a few.
If you have a WordPress website, then you can make use of the tags feature. Whenever you post your comic, make sure to post as many tags (that are related to the comic) as possible. For example, if your comic is about a boy and his imaginary pet tiger, you can use tags such as: tiger, pet, boy, cute, Calvin and Hobbes, imaginary friends etc.
Post Youtube videos. Google also loves videos. You will notice whenever you search for a keyword, Google displays videos related to that keyword right at the top of the search results. So, try and think of videos you can post. These can be tutorials on the craft of cartooning or livestreams of you creating your webcomic. Make sure to include a link back to your webcomic in the video description. Also, subtly, ask viewers to checkout your comic in the video. Be shameless with your plug 😉.
Directories
Another strategy you should seriously consider is listing your comic’s home page in comic directories. These are websites that many casual readers use to discover and bookmark their favorite comics. They are therefore perfect for promoting your webcomic. The following are a list of a few that will drive traffic to your website:
I should also mention another website called TV Tropes(http://tvtropes.org/). It is a website kind of like Wikipedia, but for pop culture. TV Tropes rank very high on Google since it is seen as a website with very high authority. Create a comic page for your webcomic here: https://tvtropes.org/pmwiki/pmwiki.php/Main/Webcomics
Advertising
There are several platforms where you can purchase advertisements for your webcomic website, including Google’s Adsense, Facebook, Twitter and Instagram. I would avoid paying for advertisements though at least until you gain a good amount of readership. The reason being, the return on investment for loyal readership is not worth the cost. More often than not you will get a bunch of one and done visitors.
A Responsive/Mobile-friendly Website
If your webcomic is self-hosted, it’s a safe bet that most of your potential readers use mobile devices to access the web. If you force your readers to pinch and scroll their way around your comic, you are basically telling them, ‘Don’t read my comic!’ Make sure your website is accessible and easy to view on all mobile devices (both smartphones and tablets).
Do you need a free mobile friendly WordPress theme for your webcomic?
If you have a self-hosted website, Google favors websites that update regularly with fresh new content. It’s therefore advisable to update your comic on a regular interval of at least twice or thrice a week, when starting out. As for web portals such as LINE Webtoon and Tapas, the more frequent you post your comic updates, the more you increase the odds of new readers discovering your work.
Comic Schedule
Make sure your readers are aware of when you post your comic. Choose a reasonable schedule that you are not likely to miss. Readers hate it when creators fail to deliver their dose of humor on time. So please choose something that you can stick by. It can be once a week, once a month, heck it can even be if once every six-months! But be aware though, that you are unlikely to gain a loyal readership if there is a large gap between updates. Especially when you are starting out. Established creators can get away with posting on a haphazard schedule.
Have a Buffer
Heard of the dreaded H-word in the comic world? Hiatus? It is a fairly common plague currently wreaking havoc in the online comic creator community. It discriminates against no one. Both established creators and novices have been known to suffer from this awful malady. The causes are usually disappointment that result from impatience and unrealistic expectations. But more often than not, the culprit is simply, burnout which is the consequence of unmanageable posting schedules, resulting in exhaustion and frustration. If you have chosen a posting schedule of, say, seven days a week, and you have a regular 9-to-5 day job, it is very unlikely you will sustain that for too long. How can you prevent a hiatus? By making use of a buffer.
The comic buffer is a backlog of comics that you create ahead of time, so that you are not left scrambling to come up with ideas for a comic that is due up the following day! It’s always a good idea to have at least a month’s worth of comics ready to go. This will also help you in case of unforeseen occurrences like an illness, or travel. Once you develop the buffer, make sure you maintain it by drawing and creating your comic every day!
Compelling Content
Strive to create quality comics that will drive readers to come back again and again. Make it as visually appealing as possible, including using color. Make the comic is easy to read. Cut down on grammatical mistakes. Check your spelling. Make the characters relatable to year readers. Let them have flaws. Create conflict between your characters. I could go on and on, but I think you get the picture. Just work on creating a comic that will be hard to ignore and that will compel your readers to share it with others.
Be weird
The webcomic landscape has become a highly competitive, cutthroat competition for readers. There are so many out there, and they cover a large spectrum of styles and genres. How do you stand out from your competition? By being weird. In other words, by being true to yourself. Adopt a style and subject matter for your webcomic that is uniquely you. You could choose to copy other popular comics such Shen Comix or Adventures of God. But nobody likes knockoffs. You are more likely to draw new readers in, if they are struck by the unique voice you bring to the table. Be true to who you are, and readers who love your authentic storylines will follow.
Practice, Practice, Practice
This goes without saying. If you are going to create good quality, compelling content, you are going to have to develop your craft as a cartoonist. It’s going to require an all-consuming dedication to improving your drawing and writing skills. Plan on setting aside 30 minutes of your day, every day, to practice writing and drawing. Your readers will thank you for it!
Patience
“An overnight success is ten years in the making.”
― Tom Clancy, Dead or Alive
If there is one thing you take away from this article, it is that your webcomic will not gain thousands of readers overnight. It takes months, sometimes years, of sustained application of the above-mentioned steps, and some luck, to get you a large and loyal readership. You therefore have to be in it for the long haul. It is not going to be easy. So be patient, love the process of developing your craft, and when all is said and done, you will reap the full rewards of your labor.
Do you need a customized WordPress theme designed for your webcomic?
Do you want to create a website for your new webcomic with WordPress? Looking to make use of the popular webtoon/vertical scrolling format? Are you looking to replicate the same model popularized by websites such as LINE Webtoon and Tapas? In this tutorial, I will show you how to create you very own webtoon styled website using WordPress. We will be making use of the Toocheke WordPress theme. The good news is, you won’t have to write a single line of code!
Do you need a free mobile friendly WordPress theme for your webcomic?
Webtoons are a type of webcomic that started out in South Korea. Their surge in popularity was thanks to the proliferation of smartphones, resulting in more and more people reading comics on their phones. The distinguishing feature of a webtoon, is a that each comic is takes the form of one long, vertical strip, using what Scott McCloud called the infinite canvas.
Assumptions
Before we start digging into the tutorial, I am making the assumption that you have already purchased your domain name as well a WordPress web hosting account. If you are looking for an ideal place to host your WordPress website, may I suggest Bluehost. You can get an introductory price of as low as $3.95 per month.
Let’s get started, shall we?
Video Tutorial
If you prefer not to watch the video or need more instructions, then continue reading.
Installing the Toocheke WordPress Theme
Toocheke is a WordPress theme that was built with a webtoon in mind. First thing you will need to do is install and activate the theme. There are two ways to do this.
Option 1: By searching the WordPress Themes Directory
From your WordPress admin panel, go to Appearance > Themes and click the Add New button.
Just do a search for ‘toocheke’ and the first result should be the one you’re looking for.
Click the Install button
You may then click the Activate button. But before doing so, please wait to read the section below on Installing a Child Theme.
From your WordPress admin panel, go to Appearance > Themes and click the Add New button.
Click the Upload Theme button
Choose the zipped Toocheke theme you downloaded, then click install now.
You may then click the Activate button. But before doing so, please wait to read the section below on Installing a Child Theme.
Installing a Child Theme
If you think there is a potential that you will do any kind of customization to your WordPress theme, you should always make use of a child theme. I cannot stress this enough. The internet is littered with the tears of many WordPress site owners who have learned this the hard way.
What is a Child Theme?
A child theme inherits all the features and appearance of its parent theme. You can change it as much as you want without affecting the parent theme. More importantly, if you do receive an update of the parent theme, and proceed to upgrade the parent theme, you will not lose any customization you may have done to the child theme. When you upgrade the parent theme, any changes made in the child theme are preserved and applied on the updated version as well. This is why child themes are always recommended. Instead of changing the parent theme directly you can simply override it with a child theme.
Do you need a customized WordPress theme designed for your webcomic?
Inside your WordPress admin area, head over to Appearance > Themes page and click on the Add New button.
Click on the Upload Theme button. This will show you theme upload option.
Click on Choose File to select the toocheke-child.zip file from your computer and then click on Install Now button.
WordPress will now upload the file from your computer and install it.
After the installation is complete, click the Activate button to activate the child theme.
Installing the Toocheke Companion Plugin
To utilize the full capabilities of the Toocheke theme, you are going to need to install and activate the Toocheke Companion Plugin. All it does is give you the ability to post a comic. You should already be seeing a notification (This theme recommends the following plugin: Toocheke Companion) in your WordPress admin panel asking you to install it.
Click on Begin Installing plugin link
You should be redirected to the Install Required Plugins page. Click on the Install link below the Toocheke Companion plugin. The plugin will install and activate.
If for some reason you do not see the plugin notification, you can follow the following steps:
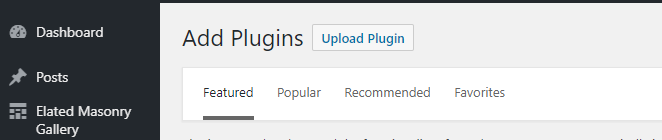
Inside your WordPress admin area, head over to Plugins > Add New page and click on the Add New button.
Click on the Upload Plugin button.
Click the Choose File button and upload and install the toocheke-companion.zip file
Click the Activate Plugin button
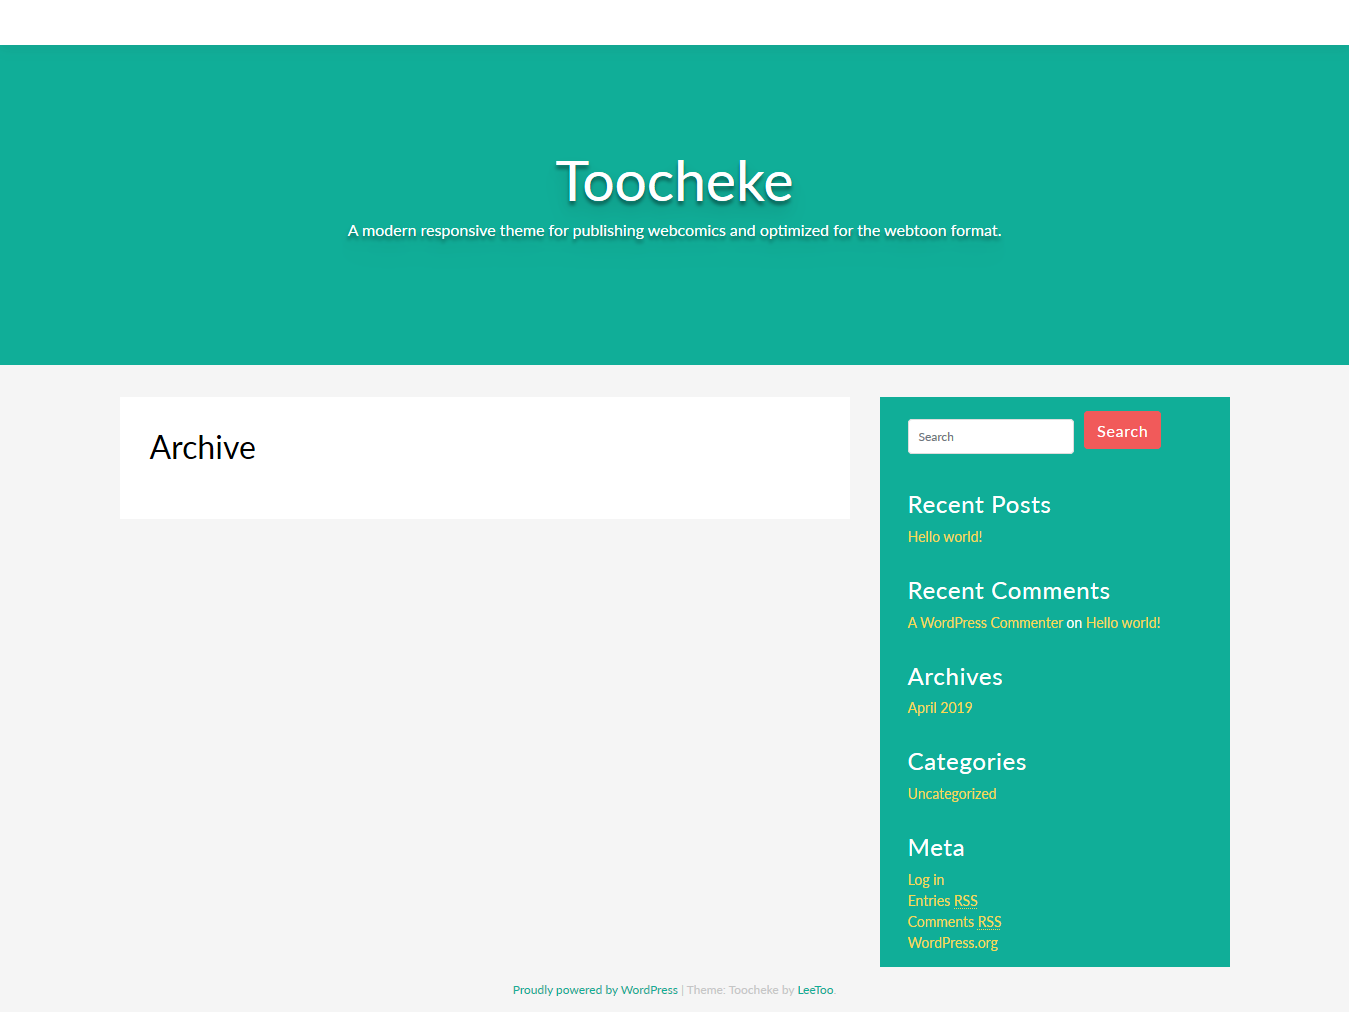
Now would be a good time to see what our brand spanking new WordPress website looks like.
Not where it needs to be, but be patient grasshopper. We will get there ;).
Adding New Pages for Your Website
You will now need to add some pages that will be accessed from the main navigation bar. I will leave it up to you to decide what you want for your menu items. Webcomic sites tend to have any number of the following pages: Home (linking back to the home page), About Us (description of the comic), Author (a brief description about the author), Contact (contact information for the cartoonist) and an Archive page (listing previous comics). Please note that the Toocheke theme already has a comic archive listing built into the home page. I will leave it up to you to decide which pages you want available from your navigation bar.
For the purposes of this tutorial, we are going to have the following menu items: Home and About. We already have our home page setup by default. But to add the About page, go through the following steps:
Inside your WordPress admin area, head over to Pages > Add New page and click on the Add New button.
For the title, enter About. For the content area, type in your content
Once you are done click the Publish… button.
Populating Your Main Navigation Menu Bar
We will now start populating your main navigation bar using the Home and About pages.
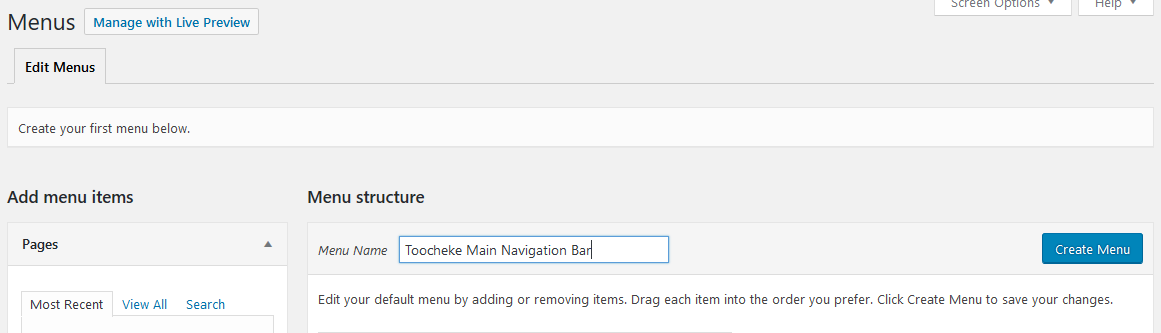
Inside your WordPress admin area, head over to Appearance > Menus page.
In the Menu structure, in the Menu Name field, add the name for your menu bar. It can be anything you choose to have.
Click on the Create Menu button
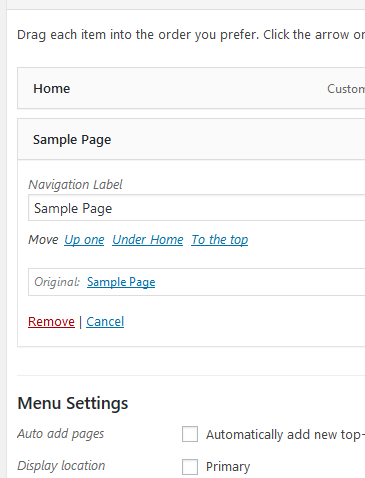
Remove any default menu items you may have (except the Home menu item).
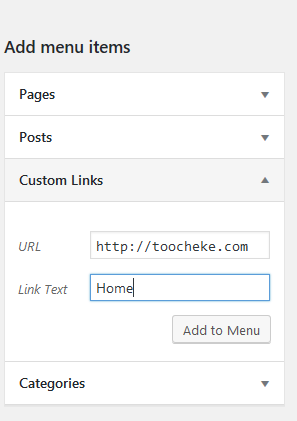
If you do not have the Home page among your menu items, under the Add menu items section, expand the Custom Links tab.
In the URL field, enter the full URL of your website e.g. http://www.toocheke.com
For the Link Text field, enter Home.
Click the Add to Menu button.
Click the Save Menu button.
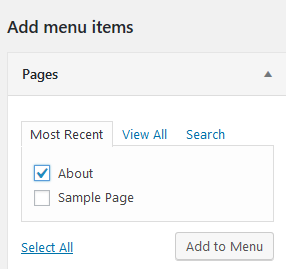
Now to add the About menu link, expand the Pages tab under the Add menu items section.
The About Us page we created should appear under the Most Recent tab, if not, try the View All tab.
Click on the check mark next to the About page and then click the Add to Menu button.
You should now have Home and About as your to menu items for your navigation bar.
Under the Menu Settings section, for the Display location field, check the Primary checkbox. Then click Save Menu. All this does is ensure our new menu will appear in the navigation bar.
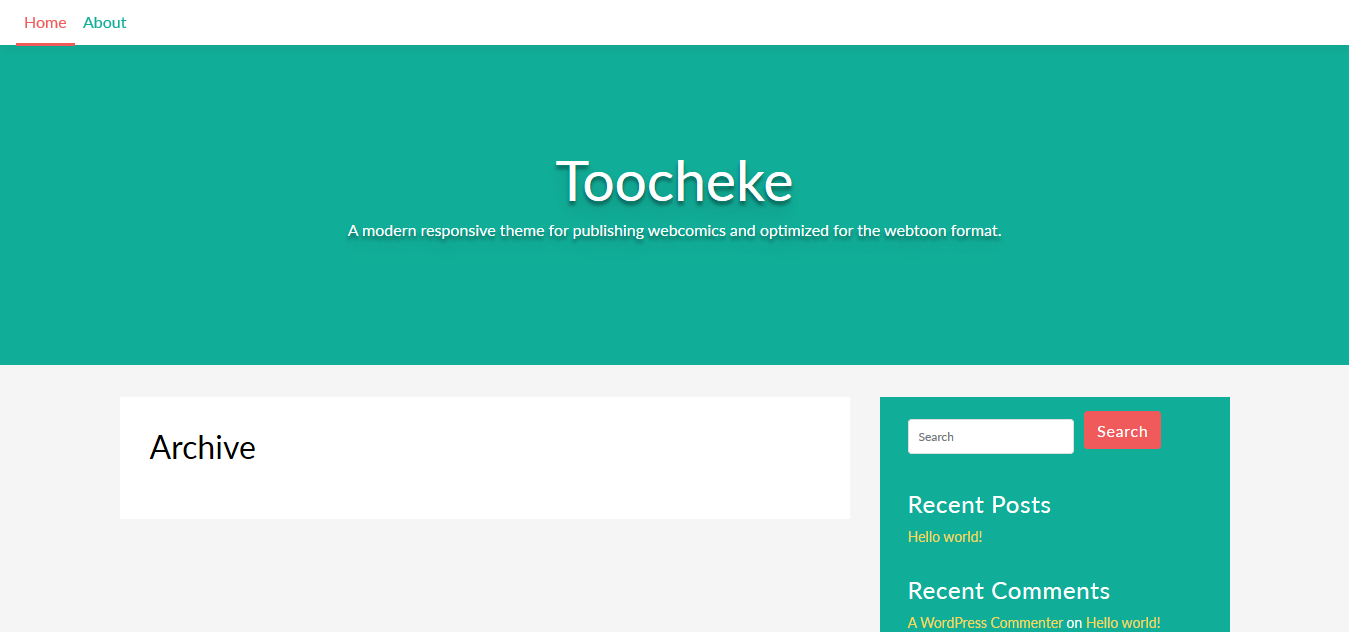
Customize the Header
Our header section looks a bit bland. Let’s spruce it up a little.
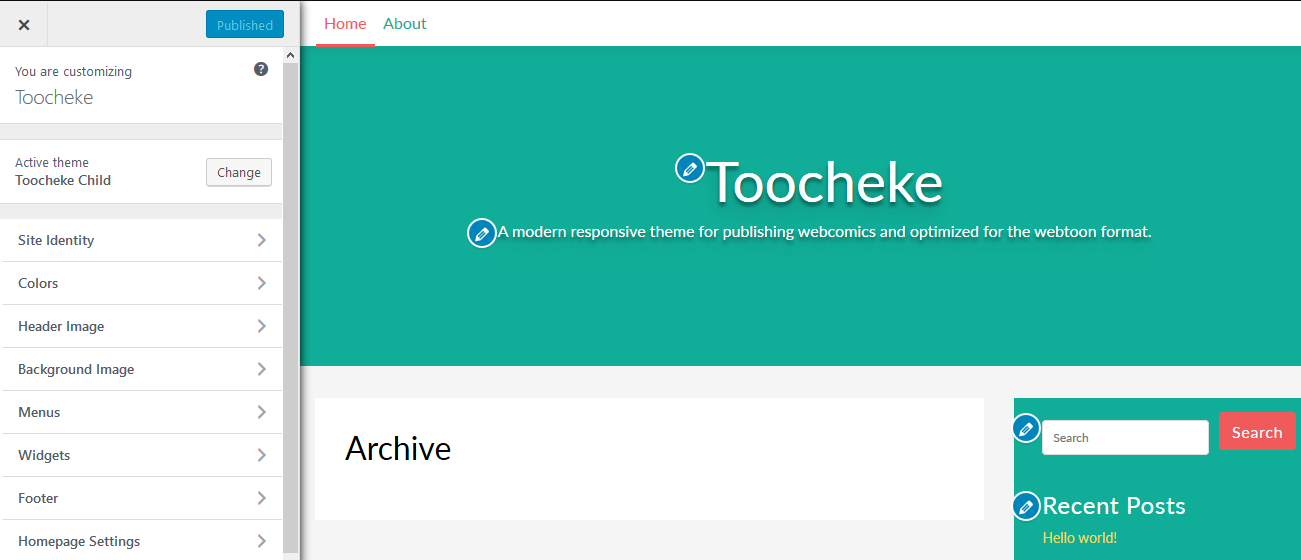
Inside your WordPress admin area, head over to Appearance > Customize page. This should load up your Customizer page.
Click on the Site Identity tab.
Update the Site Title and Tagline as you fit. Or if you prefer to hide the text in the header, deselect the Display Site Title and Tagline checkbox.
Click on the Publish button.
Head back to the Customizer’s main navigation (by clicking the ‘arrow left’ link next to the Customizing Site Identity text.
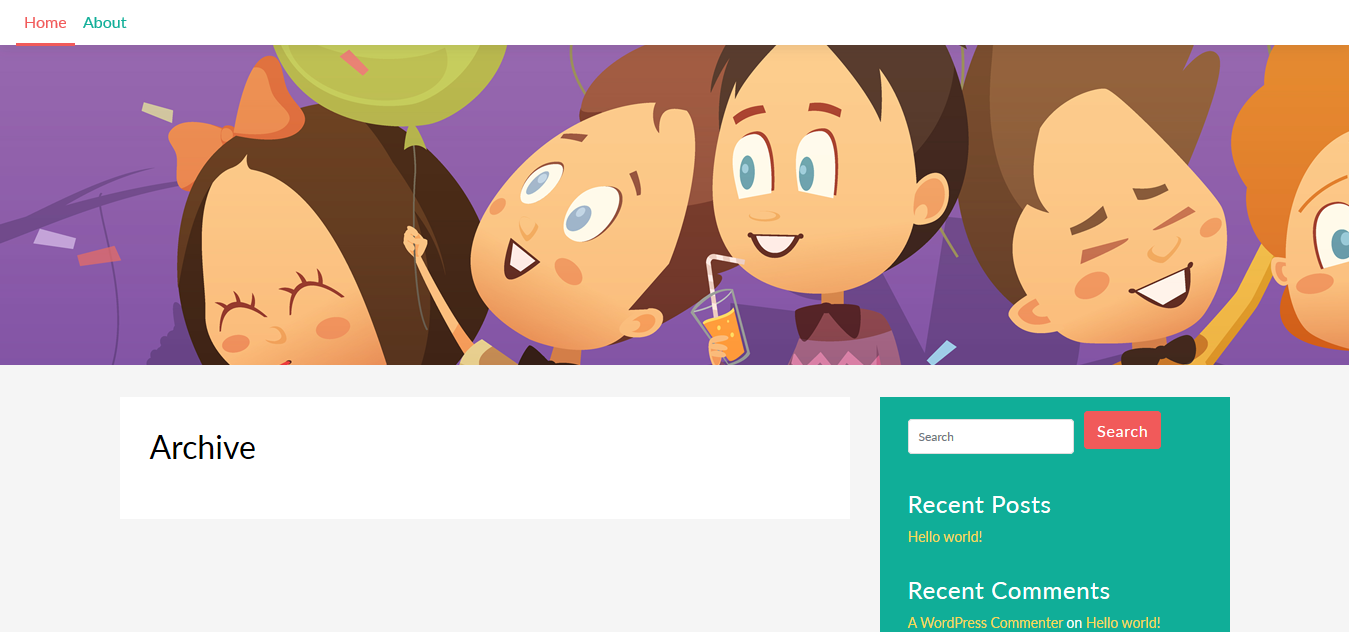
Click on the Header Image tab.
Click on the Add new image button.
Upload an image you would like to use for your header. Make sure it is 1920 by 320 pixels in size.
Click the Publish button
Exit the Customizer window by clicking the ‘x’ button in the top left corner.
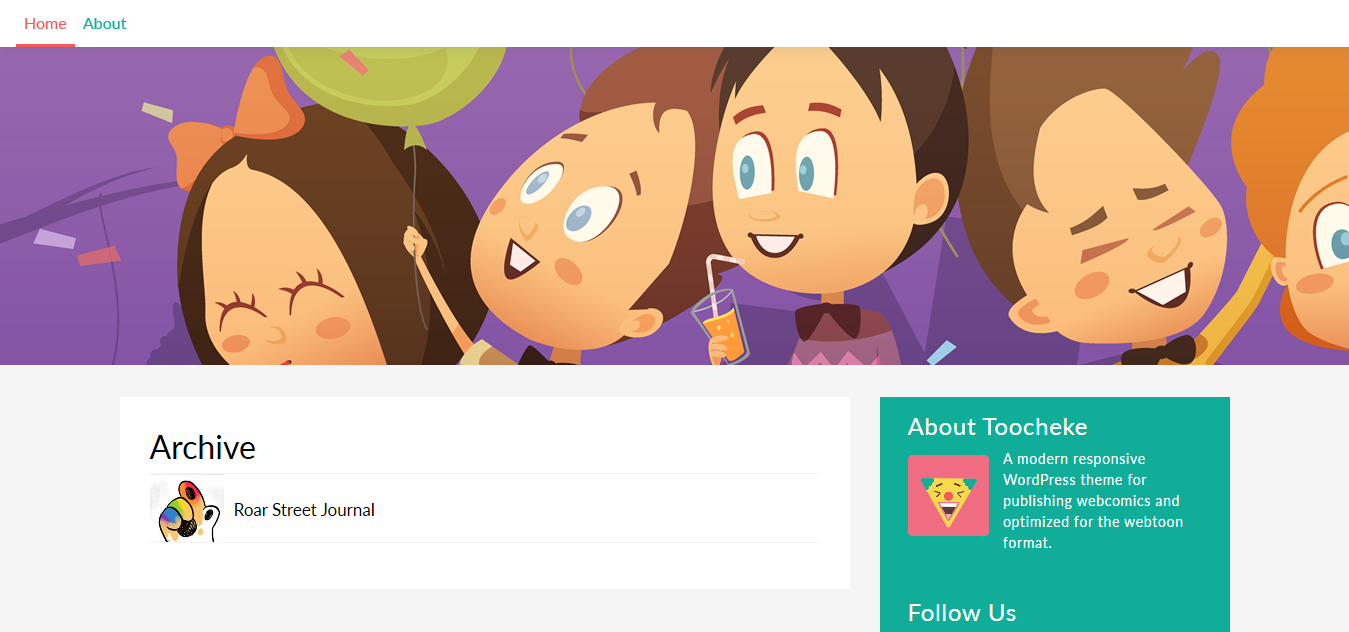
You should now have an updated header.
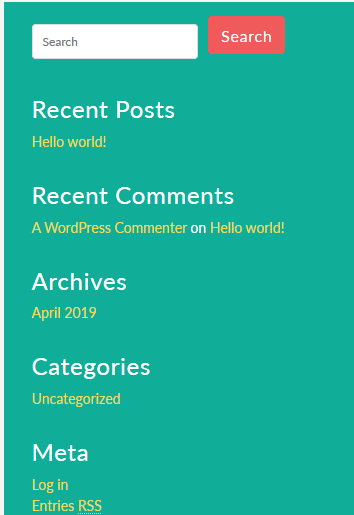
Customize the Sidebar
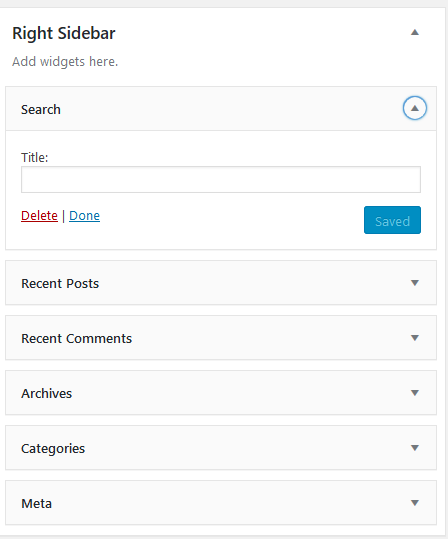
Now let change up the Right Sidebar a little bit. You will have noticed that it may have default content added in by WordPress.
We are going to remove all the widgets currently in the sidebar, and replace them with a couple of Toocheke widgets: Social and About Us.
Inside your WordPress admin area, head over to Appearance > Widgets page.
Expand each of the widgets in the Right Sidebar section, and click the Delete link.
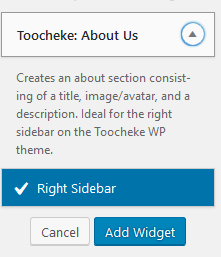
When the Right Sidebar is empty, over in the Available Widgets section (on the left), locate the Toocheke: About Us widget. Expand it. The Right Sidebar should already be preselected. Click the Add Widget button.
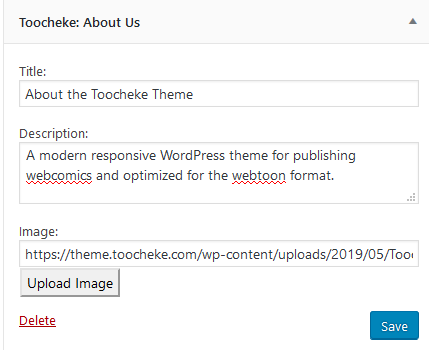
Enter the Title and Description fields. This could be a brief description of your comic. Also upload an avatar image if you wish.
One note, make sure when uploading the avatar, on the upload window that pops up, scroll down to the Link URL field, and click the File URL button. Then click the Insert into Post button.
The Toocheke: About Us widget should now have all fields filled out. Click the Save button.
In the Available Widgets section (on the left), locate the Toocheke: Social widget. Expand it. The Right Sidebar should already be pre-selected. Click the Add Widget button.
Fill out the title of the widget area as well as all your social media links.
If you’d like to add an RSS feed to the Toocheke: Social widget, it should have the following format http://www.yourdomainname.com/comics/feed
Click the Save button. Voilà: the sidebar is ready.
Publishing Your Comics
Now comes the fun part that I know you have been dying to get to. Posting your comics!
I’ll be working on the assumption that you’ll be posting a webtoon/vertical scroll formatted comic. The Toocheke WordPress theme is optimized to display vertical comics. With that in mind you will need to do some prep work on each of your comics.
Make sure that your comic image is at least 800 pixels in width. This will ensure that the comic will display well in high-resolution, large screens.
Given that your comic will be very large, I would recommend you slice up your comic image into several images. You don’t want your readers waiting to load the whole comic into their browsers. A sliced-up comic reduces “page weight” or load time considerably for the reader, thus improving the reading experience. Here is a great tutorial on slicing up your comic.
Make sure each of your sliced images are at 72 dpi resolution.
Also make sure you create a thumbnail image for your comic that is at least 70 by 70 pixels (at 72 dpi). This will be used for the archive section on the home page as well as the comic slider on the comic page.
When you have finished prepping all your comics, go through the following steps for each of your comics.
Inside your WordPress admin area, head over to Comics > Add New page.
Enter the title of your comic.
Upload your comic’s slice images using the Add Media button.
On the right side under the Featured Image section, click on the Set featured image link.
Upload the image and then click the Set featured image button.
Click the Publish button to post your comic.
That’s all there is to it! Your comic should now show up in the Archive section in the home page.
And when you click on the comic thumbnail, it will take you to the comic’s page.
One final note. You may encounter a 404(page not found) error when you try to access the comic’s page. To resolve this, do the following.
Inside your WordPress admin area, head over to Settings > Permalinks page.
Under Common Settings, make sure you select Post name. This is ideal for SEO purposes.
Make sure you click the Save Changes button, whether or not you changed the Common Settings.
That should resolve the 404 error.
You should now have a fully functioning webtoon style, webcomic site. Hope you enjoyed the tutorial and feel free to tweet at @toocheke if you have any questions.
Happy tooning! 😉
Do you need a customized WordPress theme designed for your webcomic?